Sony FE 35mm F2.8 ZA on the A7R: The 'Bisto' lens.I have a friend who is an excellent professional chef (he's a pretty good photographer, too!) and he makes amazing gravy. I used often to eat Sunday roasts in his restaurant and every time, whether chicken or beef, this gravy was fantastic. Richly, thickly, meatily, lip-smackingly great. Over the years I begged him to tell me the secret. "At home," I would say, "I do it all properly: I make stock the slow way, I add herbs and wine, I thicken and reduce and strain and generally mollycoddle the damned stuff, but it is never as good as yours." Eventually he cracked. "I have a dirty secret," he said. "I use Bisto." I was utterly shocked. Bisto, for those who are not familiar with it, is the sort of thing that I imagine people in the 70's made gravy with. It comes most commonly in the form of granules and, when added to hot water, saves a lot of time and effort. But in the competitive world of new millennium home cooking where everything has to be either fresh, seasonal and local or exotically imported, it is the sort of ingredient that some advanced amateurs would not easily admit to using. To find that a professional chef, and one whose gravy was the sine qua non of gravies, the über gravy, used this stuff, was shocking. "I make the gravy properly first," he blushed, "boiling bones or carcass with vegetables and herbs, skimming off the fat, reducing, the whole thing. And then at the end I add a little Bisto. Most professional chefs to it," he added, trying to reclaim his pride."They won't admit it - but we all do it." So let's take a look at the ingredients on a packet of Bisto Chicken Gravy: Maltodextrin, Potato Starch, Salt, Vegetable Oils, Flavourings, Colour (E150c), Flavour Enhancers (E621, E635), Dried Chicken (2%), Whole Autolysed Yeast, Emulsifier (E322) (contains Soya), Vegetable Extract, Spice Extract,, Pepper Extract, Onion Oil. Oh, and I should add that per 100g, it has sodium equivalent to 12.08g of salt. That's 12%. Yum yum yum. So what does this have to do with the Sony FE 35mm F2.8 ZA lens? Plenty. A few years back, when Hasselblad announced that their Medium Format system designs were now going to involve making corrections for certain lens characteristics in post capture processing, some photographers imagined the end of the world. Now, rather than designing a lens with low distortion and good control of various aberrations, the argument went, camera manufacturers would strap on any old bottle and then tweak the results in software. It was the beginning of the end of 'real' lens design, and This Was a Bad Thing. Instead of making gravy in the time-honoured way, the photographic industry was proposing to bang in the Bisto at the last minute. Shocking. The Sony 35mm F2.8 is the logical extension of this process: it has a lot of help at the Bisto stage. In trying to be small, light, excellent and cost-effective on a camera with a short flange to sensor distance and therefore quite a steep peripheral ray angle, it needs all the help it can get: Distortion, CA, Colour Shading, Luminance Shading, even 'Diffraction Reduction Technology' (and of course Noise Reduction, Sharpening, Saturation and so on)... ...all remedial processes applied in-camera or in-post, to tweak the files for their public appearances. This makes it either very simple or very complex to use and understand. You can turn corrections on, select JPEG and shoot away in the knowledge that you'll get 36mp files of very good quality that, depending on aperture, are acceptably sharp at the edges and even corners, have moderate-to-no levels of colour shading, pretty much non-existant CA, and no discernible distortion. Alternatively, you can turn all the corrections off, take your time, expend some effort, and make gravy the hard way - and with very nice results. I think this is largely a good thing. We don't live in the past: we expect modern tecnological miracles from our equipment and we want this to come cheap. Sony is charging far less for this camera than, for example, the similarly-sensored D800E from Nikon will set you back. They are delivering it in a much, much smaller and lighter package and with much better Live View and a focus system which, if slower and less capable in the area of continuous and tracking focus, is IMHO the most accurate way of focussing a lens I have yet found in a high resolution system. And if, in order to achieve this bargain priced quart in a pint pot, they had to use some Bisto, so be it. The proof of the gravy is in the tasting, especially when the Bisto is largely optional. So let's make some gravy. I'm going to get the irritation (and it is a big irritation) out of the way first: it is hard to know which corrections are applied when, and to which types of file. The camera Menu options list has a Lens Comp tab, and under it there are choices for Shading Compensation, Chromatic Aberration Compensation and Distortion Compensation. Each of these is either 'Off' or 'Auto' and there is no mention in the rather slim camera manual of whether each or all of these applies, when set to Auto, to RAW as well as JPEG files. As it turns out, Shading Compensation (which covers both colour and luminance vignetting) is applied to both JPEG and RAW files when set to Auto, whereas the Distortion Compensation is applied only to JPEGs, leaving RAW file distortion to be corrected, if at all, in post. Chromatic Aberration Compensation is the same: it is applied to JPEG files only and, as an aside, is not fully effective. This makes for some very complex decisions, best summarised as follows:
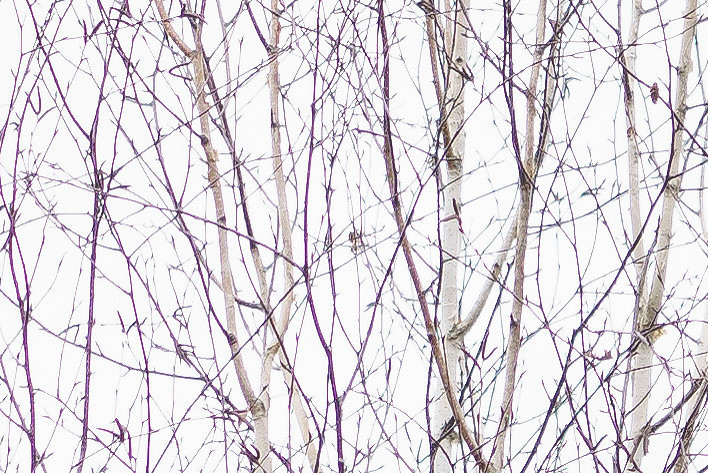
This is all rather tedious: I would like the option to apply or not apply each of these corrections to a RAW (or at least part-baked) file in-camera. Ideally, I would also be offered the choice to make separate choices for colour shading and luminance shading. Moreover, remembering which corrections do and do not apply to RAW files is onerous and prone to error. That's my biggest beef with the system - the rest is quite good news. Let's look at various aspects of the lens in more detail. Chromatic Aberration Here are two crops, from the same frame, shot as RAW+JPEG and with corrections turned to Auto in camera. The first is from the RAW file and the second from the JPEG and I should add that this was a torture test, because CA is really quite hard to provoke. I had to overexpose and shoot directly into the sky.
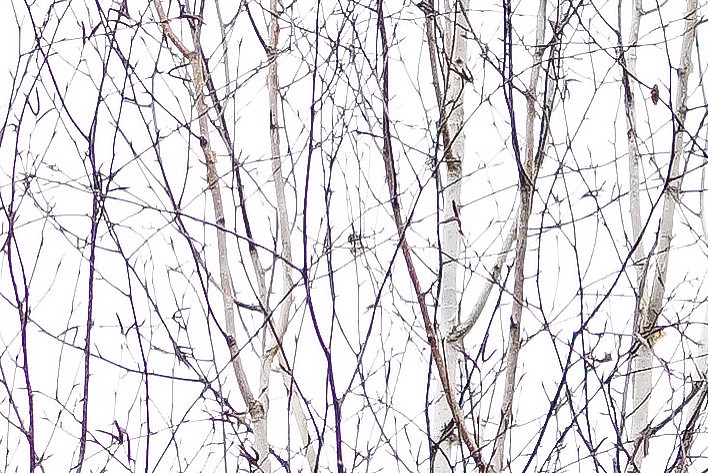
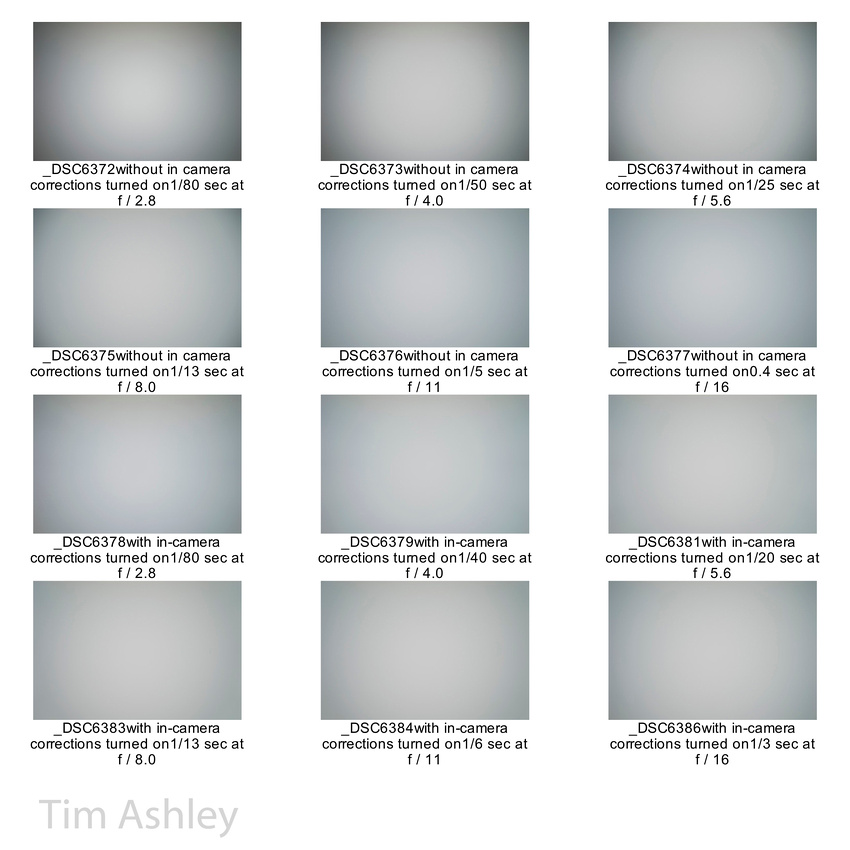
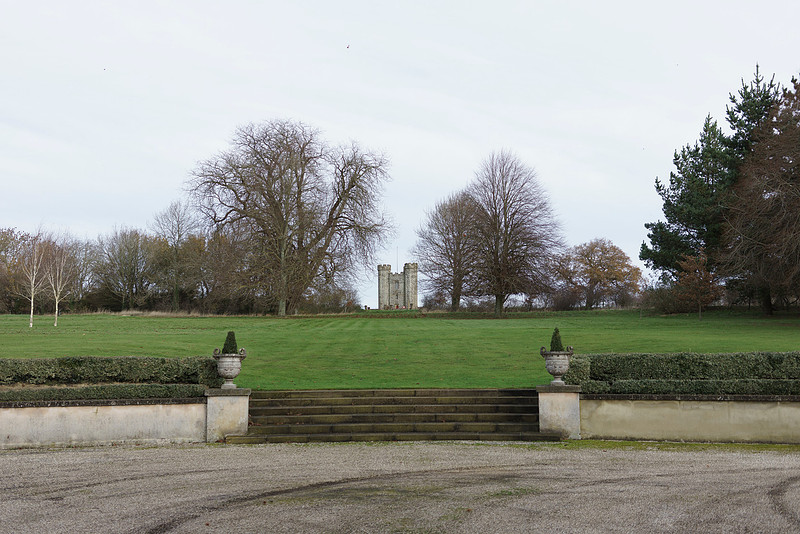
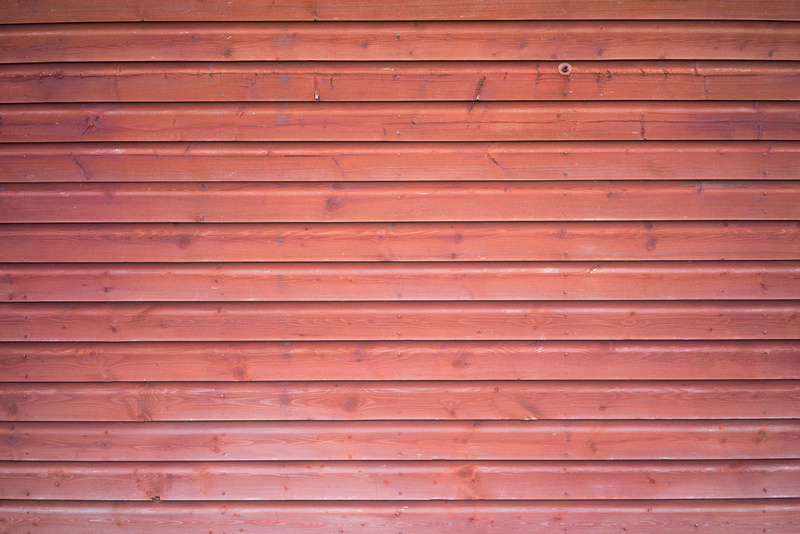
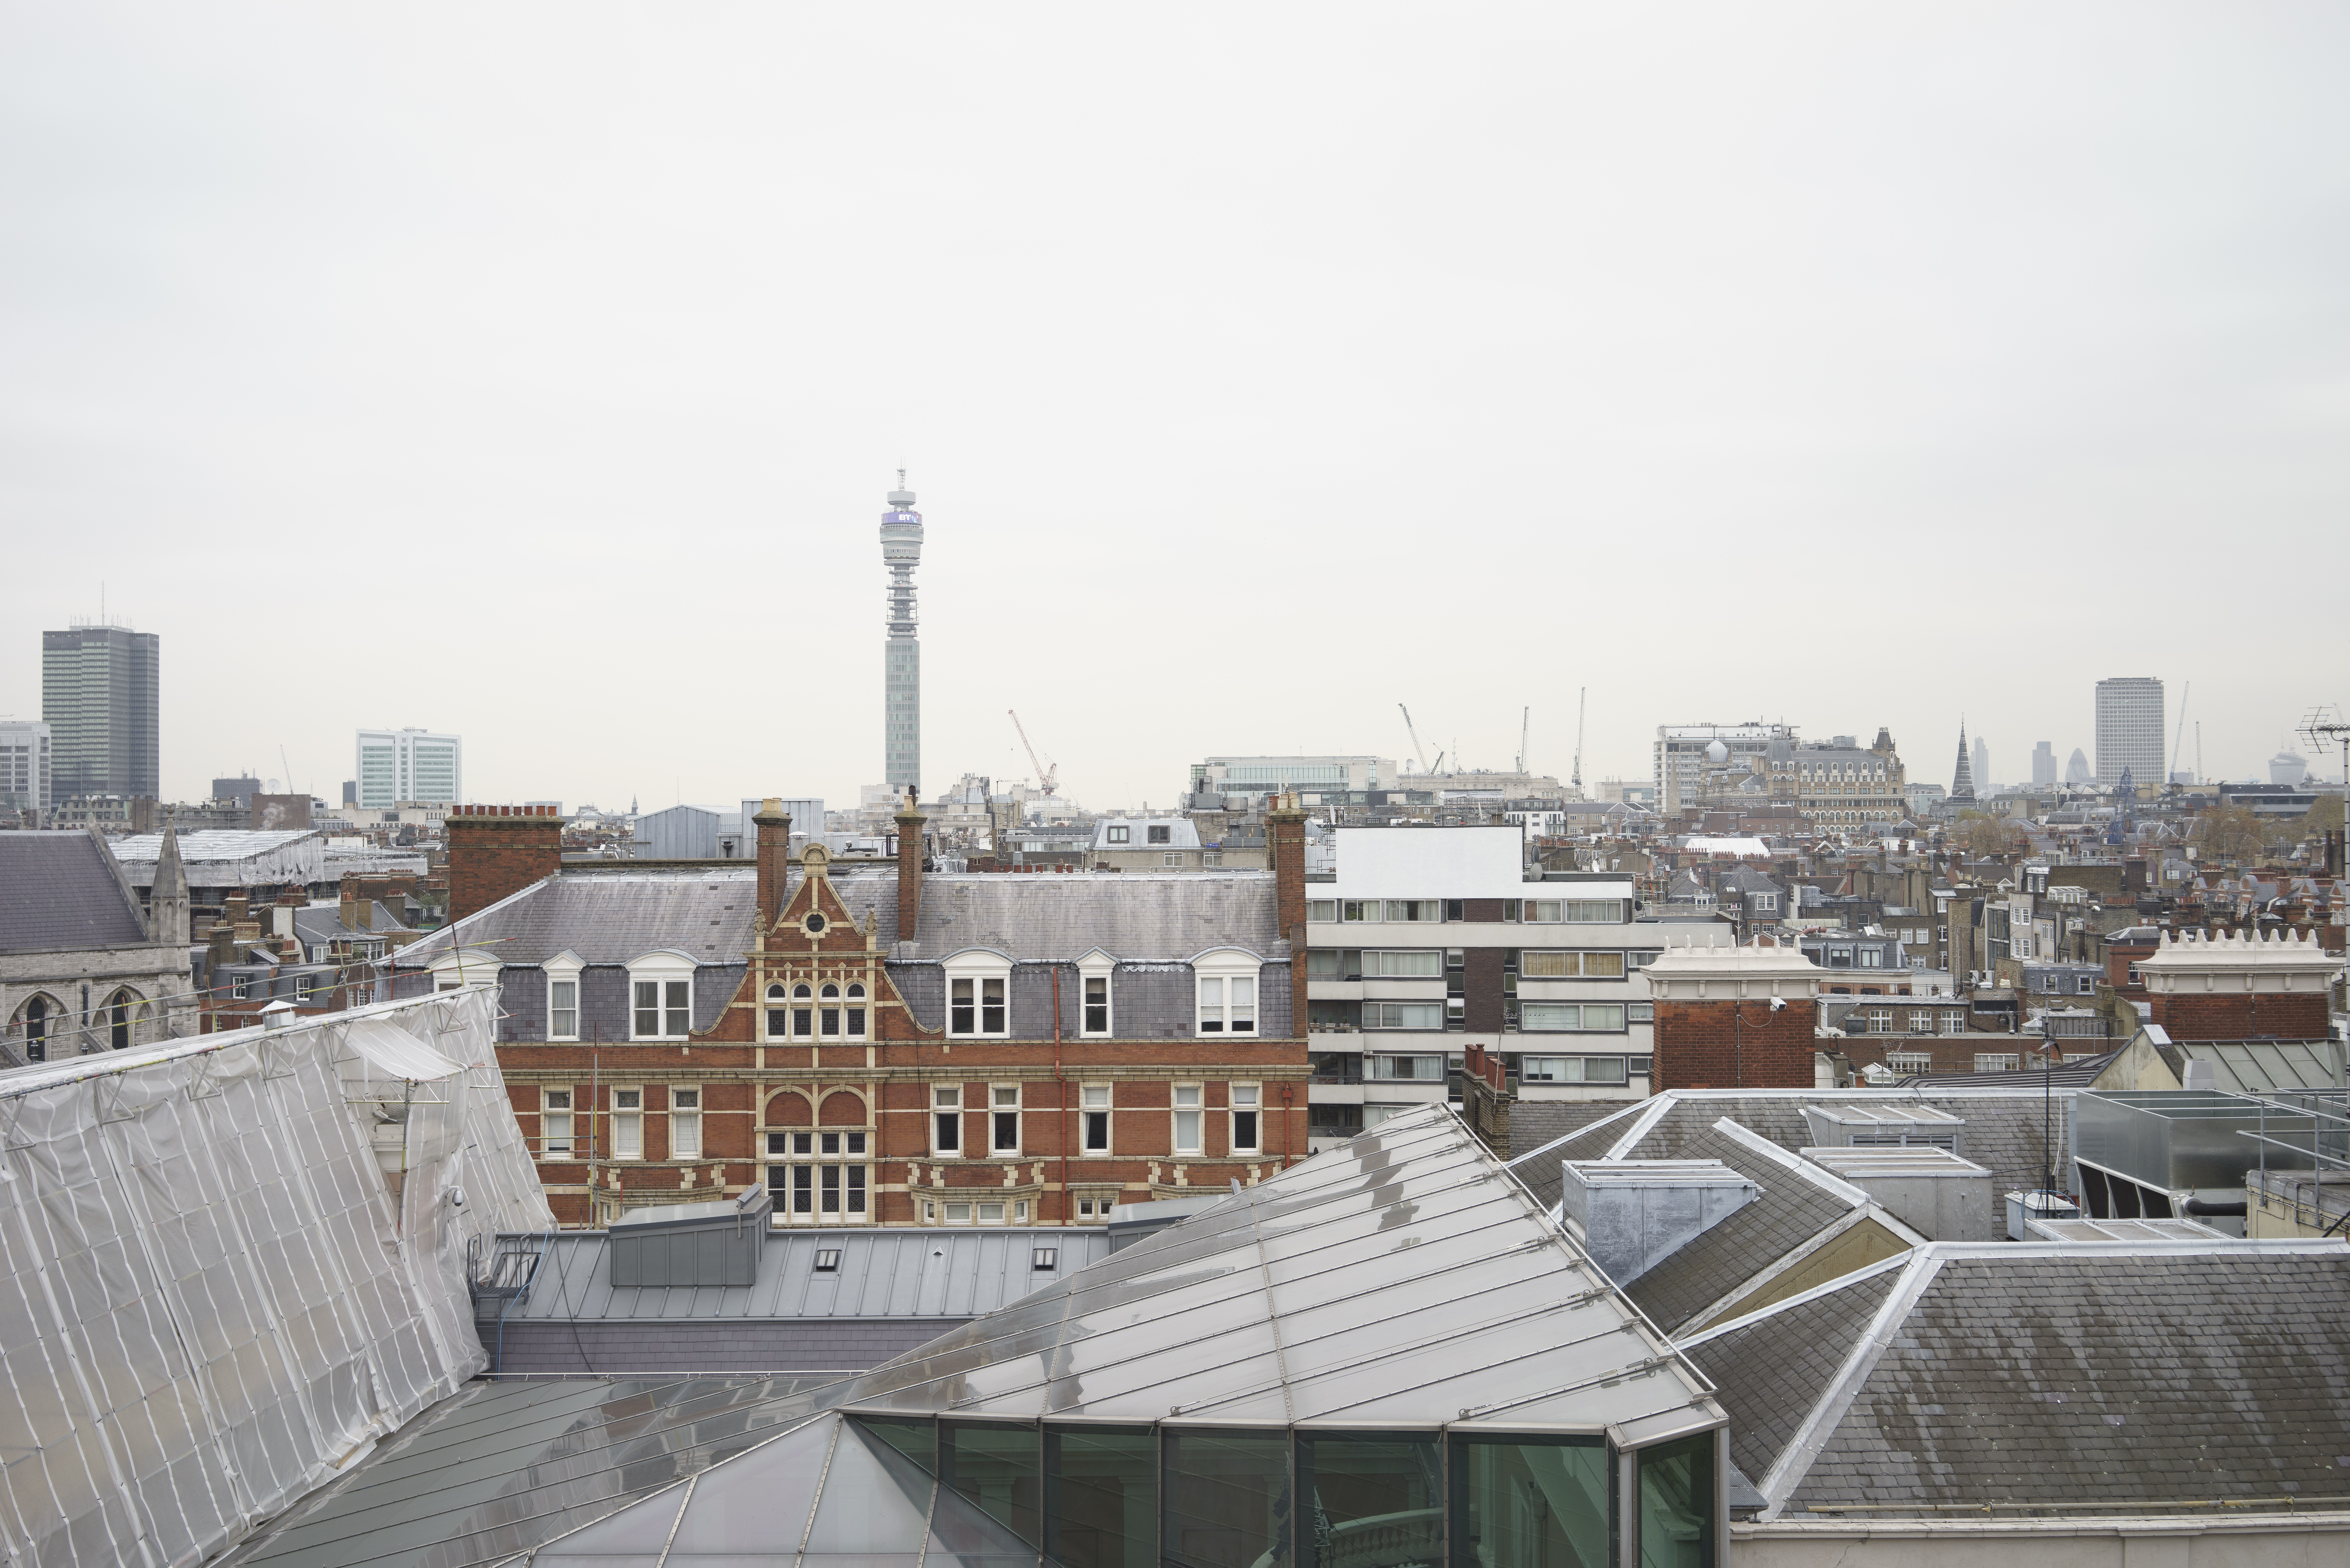
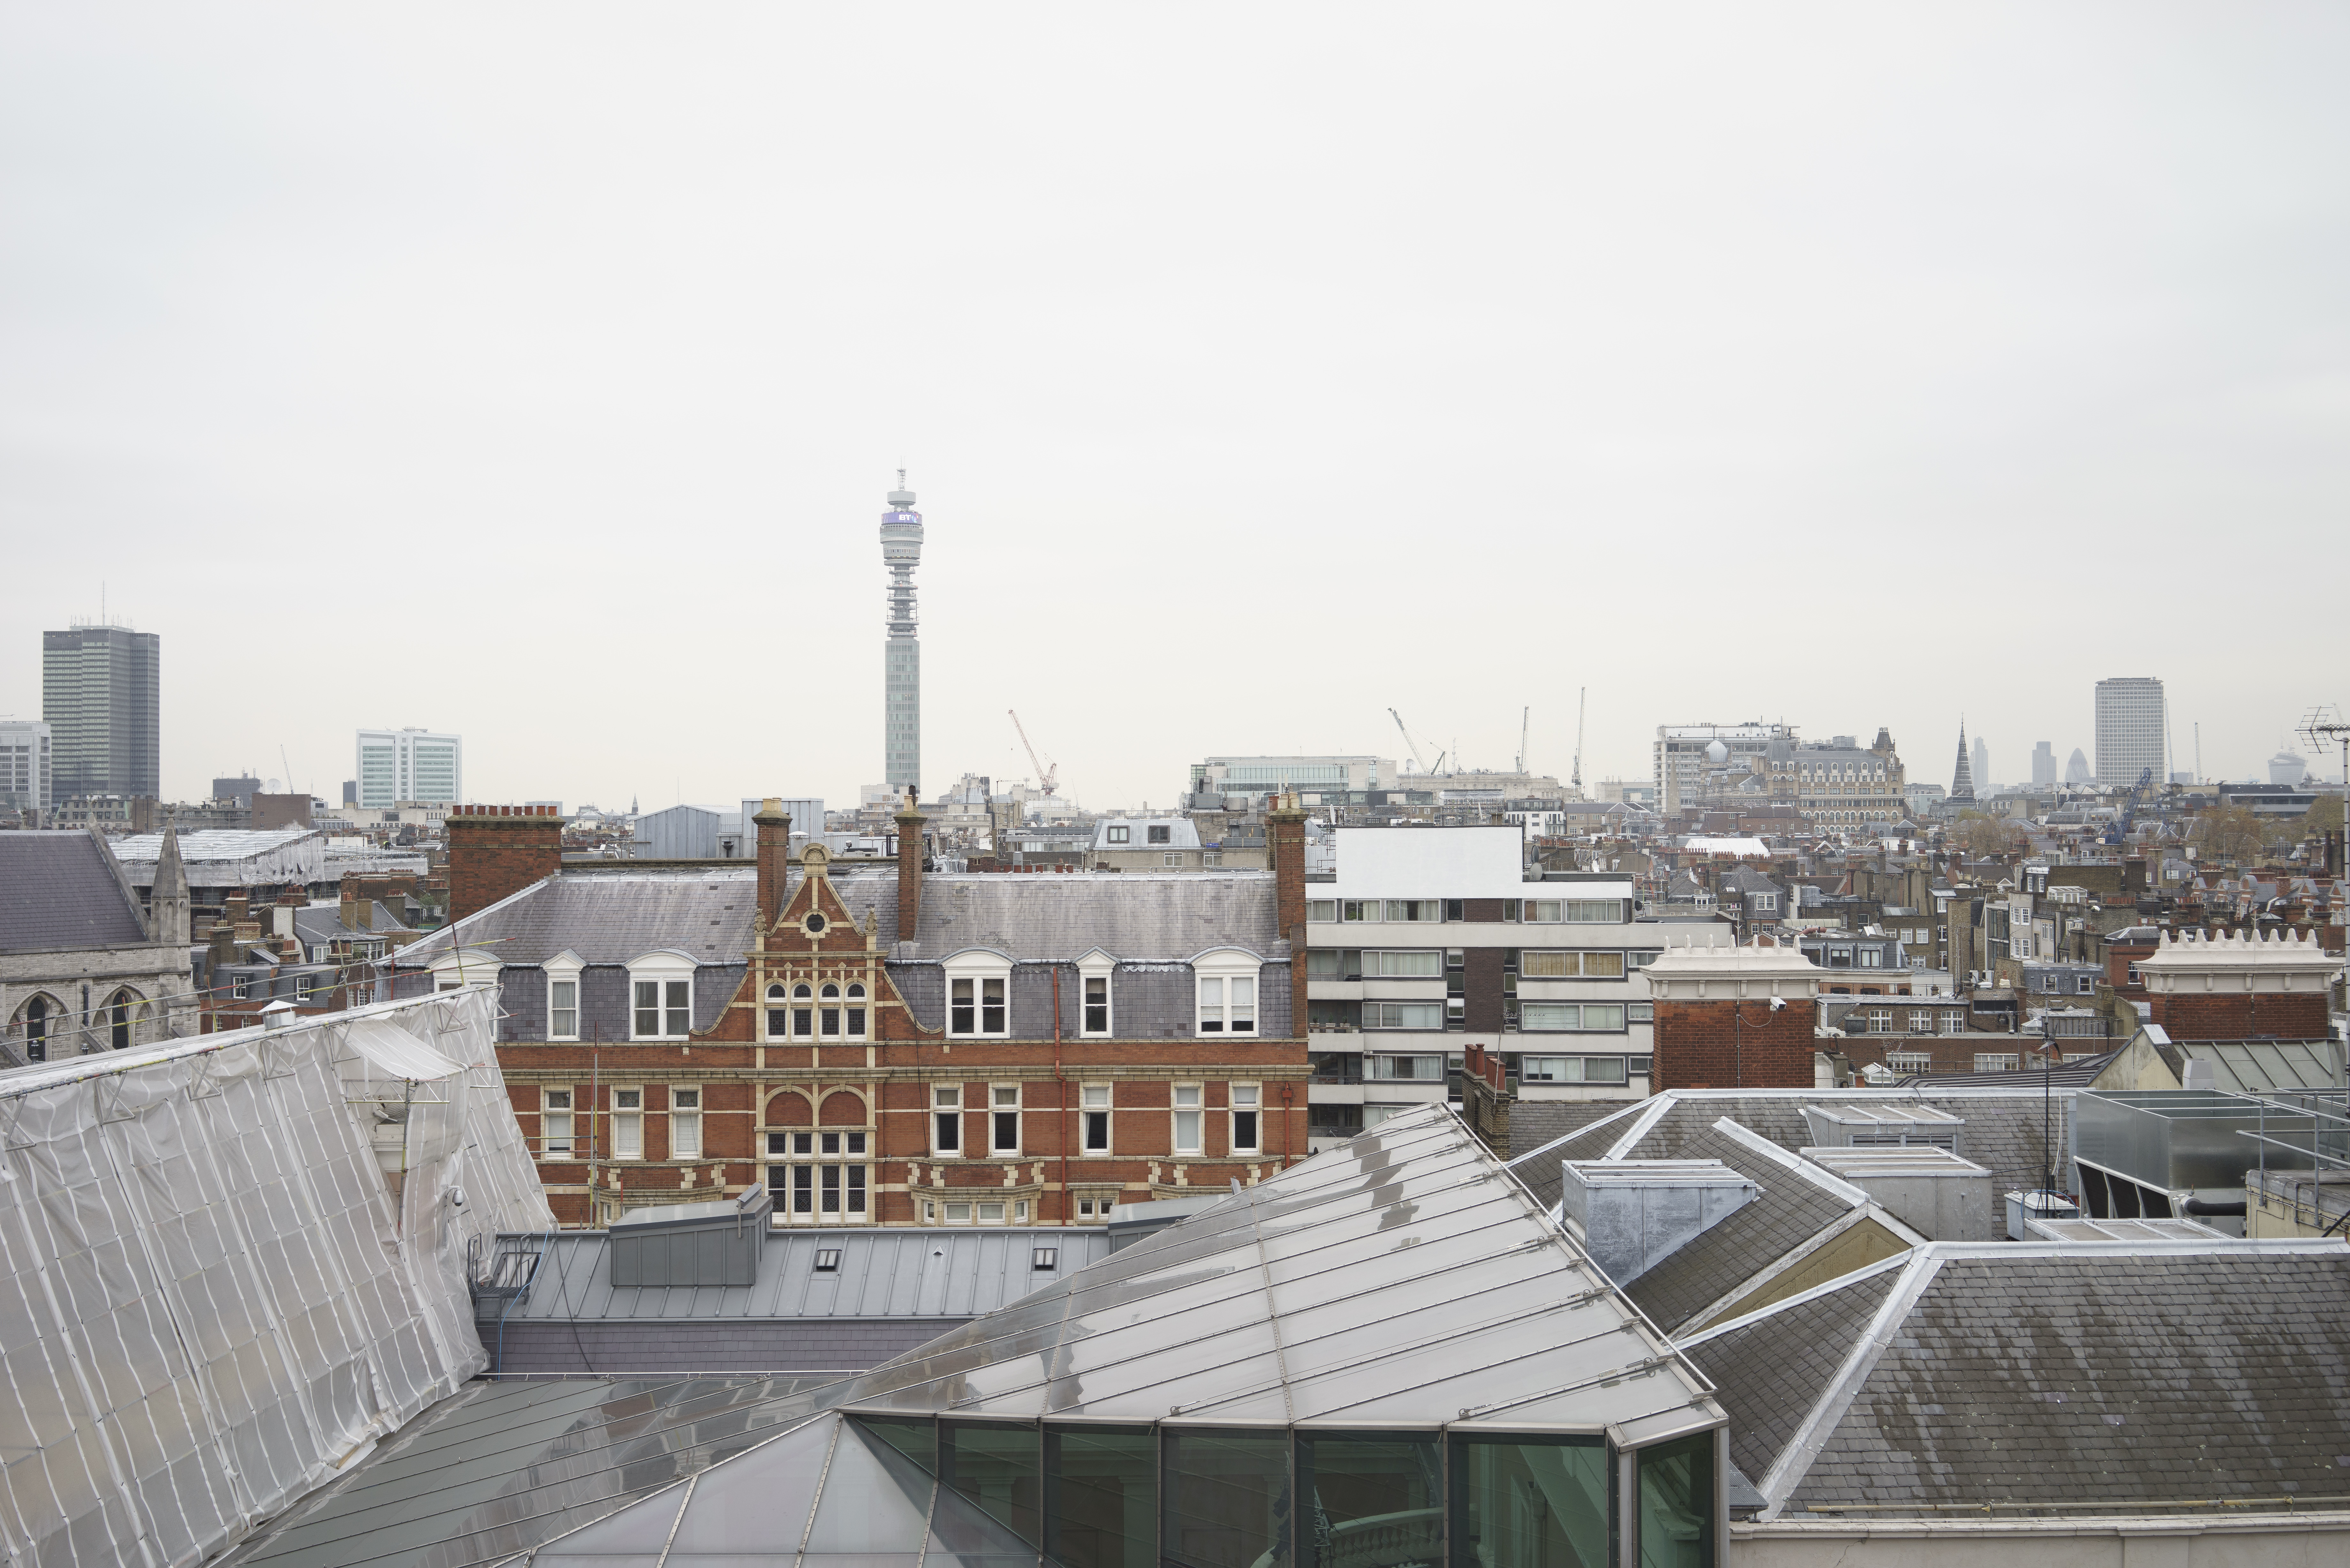
As you can see, the in-camera purple fringing correction is not applied to the RAW file and even in the JPEG file is not fully corrected. I am not a JPEG shooter, so I will be leaving this set to OFF and will correct it in post when needed. Shading Just like the RX1, the A7R has a short flange to sensor distance and this means that the light rays reaching the peripheries of the sensor arrive at an acute angle and this can lead to somewhat severe luminance vignetting and to 'colour shading' effects too. This tends to be worse with wide angle lenses and at wider apertures and contrary to popular opinion, is not a problem only for users of adapted legacy lenses. The FE 35mm F2.8 on the A7R has both problems to a moderately severe extent and the in-camera corrections are only partial. Here is a series of frames shot through a thick perspex sheet known as a Lens Cast Calibration sheet. They show how, at a variety of apertures, the problem manifests in a spectrum from quite severe to reasonably mild. They were shot with the lens focussed close to infinity and all in-camera corrections set to both ON and OFF. As you can see, turning in-camera corrections ON makes a significant difference but doesn't eliminate the problem entirely. I have two theories as to why this is, bearing in mind that the Leica M240 has the same problem. The first is simply that applying a full correction will under certain circumstances 'stretch' the colour data in the file too far, leading to excess noise in those areas of it where the colour data has had to be pushed around the most, especially at higher ISO. The second is simply that in truth, the only calibration profile that fully fixes a colour cast is one made from a calibration shot taken at exactly the same time as the file to be corrected. The specifics of the calibration shot are affected primarily by aperture, then by focus distance and then by ISO and the colour temperature of the light under which the image is made. So making one profile that always works is simply not possible unless a truly massive number of permutations are made and stored in-camera. Even then, the slightly varying alignments of each individual copy of a lens would make the exercise of making a general library into more of a hopeful exercise than a completely successful one. So we need to live with the fact that in-camera corrections will never be fully effective. This may be why Sony doesn't allow colour shading corrections and luminance shading corrections to be individually selected: often, the problem is less visible in a brighter sky (an "ETTR" sky can look quite clean even at F2.8) and is more pronounced in a darker one, and of course traditional vignetting gives darker corners which might exacerbate the appearance of the effect. Let's see what this means for an average real-world file at F2.8, the aperture most badly affected. The following series of photos shows the same scene shot with: In-camera corrections OFF:
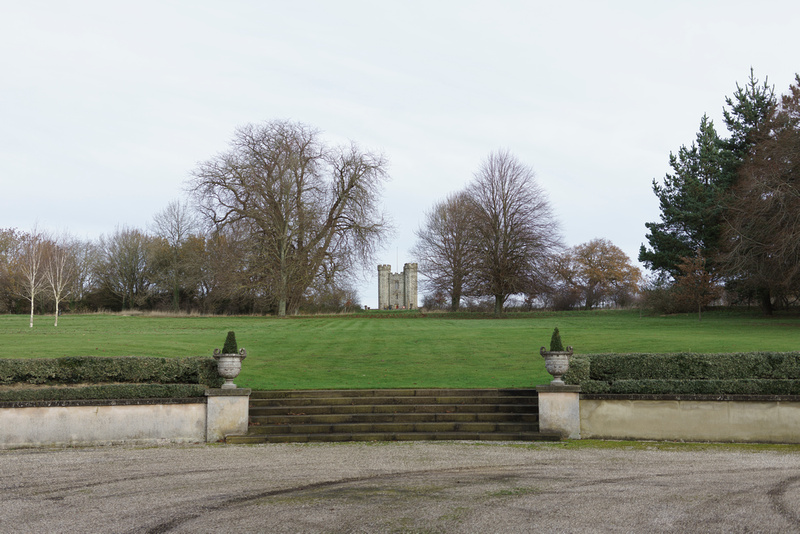
In-camera corrections ON:
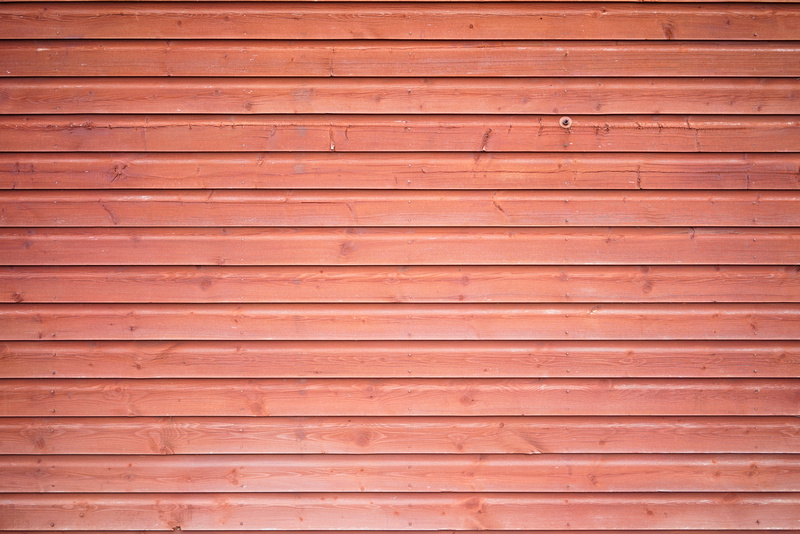
The first frame corrected with its own bespoke LCC profile using Lightroom's DNG Flat File plugin for both colour and luminance shading:
The second frame corrected with its own bespoke LCC profile using Lightroom's DNG Flat File plugin - note: this is a 'double corrected file' because I have added Lightroom Plugin corrections on top of the in-camera corrections:
Finally, the first frame (no in-camera corrections) corrected with LR Flat Field plugin but only for colour, not for luminance, shading:
Please note: this series of images is available here and you can download them at full resolution in Adobe RGB for more accurate assessment: Zenfolio converts the images on my blog pages to sRGB and that makes proper assessment from this page alone somewhat difficult. Added 9th December 2103: notice that the first and last images in this series look very similar: this bothered me again and again. A correspondent suggested that there was no colour correction going on at all when using the in-camera 'shading correction' option, merely luminance shading correction. Then Lloyd Chambers noted something similar. I took another look and I have a call in to Sony engineers to try to get a definitive answer. Having found no useful answer in the manual I searched for another resource and found the online HTML manual which contains somewhat more detail: you can find it here and I quote from it: "Menu item details
Auto (default setting):
Off: In other words, it seems that there is no claim that colour shading correction is going on at all. I think the reason that I and so many people thought there was is probably buried in the mists of time: the RX100 and RX1 both had shading correction and reviews of them at the time widely considered them to be applying some color as well as luminance correction. It is easy to allow the evidence of one's eyes to back up the idea that a partial correction is indeed taking place because as luminance is lightened, the appearance of the intensity of colour shading is ameliorated. I hope to bottom this out with Sony in the near future but in the meantime, I can only suggest that if colour shifts across the frame bother you, you learn to shoot and deploy calibration frames as discussed elsewhere win this article. If I can get Sony's confirmation on this matter, I will re-write the relevant sections of this piece. Now, everyone will have their own takeaway from this depending on their personal preferences. Mine is informed by the fact that different scenes are affected to differing extents and that one example is just that: one example. No general practice can be drawn from it. But I do have some general observations: It would appear from a theoretical perspective that best practice would be to always shoot with corrections OFF in camera, then to make a bespoke LCC calibration shot for each frame and apply it later. Additionally, it would seem best to apply this calibration only to the colour shading and not to luminance vignetting: some degree of vignetting is usually pleasant and it is better to work with the natural shape of the vignette of the lens in question than to add vignetting back in Lightroom. But there are some significant 'howevers': it seems to me that I, and I think most photographers, will find the in-camera corrections satisfactory most of the time. It also seems to me that carrying an LCC diffuser sheet isn't in the gestalt of the camera. Nonetheless I will generally carry one but unless I am treating the A7R like a Medium Format camera (when I write my review of it I will explain this deployment in more detail) I will shoot with corrections on and where I am a bit concerned about the susceptibility of the scene, I might either shoot a calibration frame at the time (note: if shooting with corrections ON you must shoot BOTH the image and the calibration frame with them ON) or use one from my library (again you will need two libraries: one with corrections ON and one with corrections OFF) in post, bearing in mind that library corrections are never as effective as bespoke ones but will often help 'enough'. This seems to contradict what I said above about not adding corrections to corrections and about keeping the imaging chain as short and pure as possible. It does. But the downside is so irrelevantly small (at least at lower ISO) in my experience so far as to be irrelevant. The takeaway?
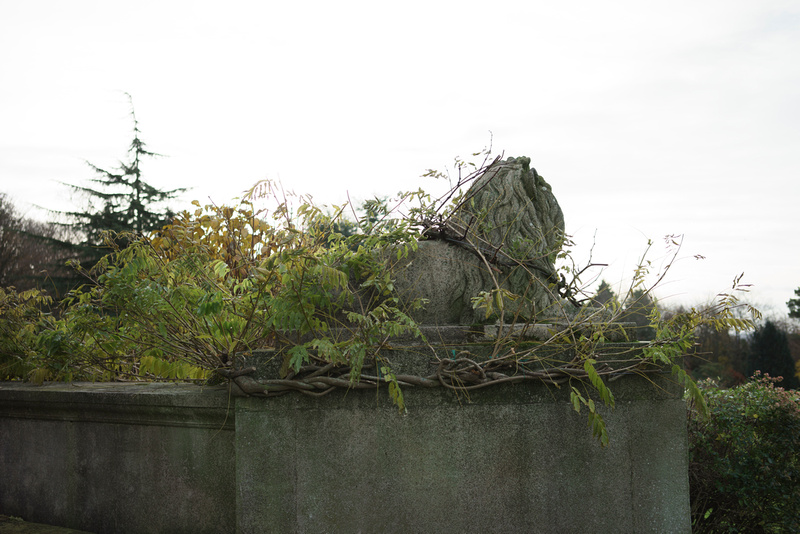
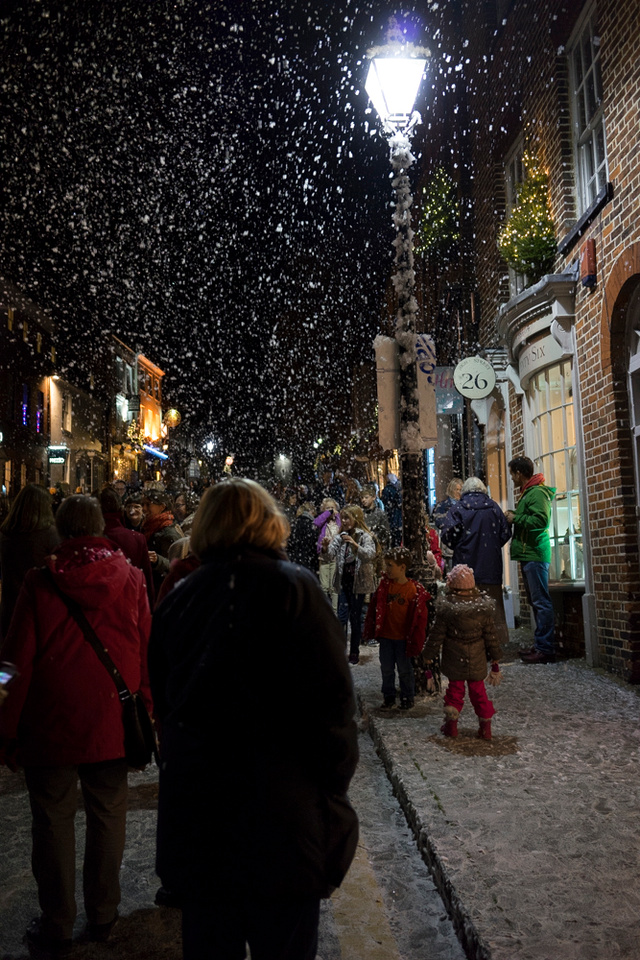
Focus Focus speed and accuracy are, of course, a function of a system and not of a lens alone. My takeaway is that the speed of Auto Focus is gentlemanly rather than acute, but perfectly acceptable to me. I very, very often use MF in any event and, especially when used with the EVF and magnification, this system of lens and camera is the best I have ever used. For AF, select the smallest of the three available focus frame sizes so as to get optimal accuracy but do be aware that even with the small frame, the camera will sometimes choose something behind the subject. In cases where this is a risk, switch to MF. Per tracking, I wouldn't bother with it myself. My preferred method is to turn peaking on and hit the shutter when the subject triggers the peaking. Focus Shift I won't bother to post the test results because at a few inches and a few feet, I see no measurable focus shift. There are shots in the gallery of a Spyder target and you are welcome to peruse them. Flare The weather here hasn't given me the cloudless sunny skies that one needs to fully test for flare but the following frame was shot with a very bright but slightly hazy sun in the frame. It shows that flare is very well controlled indeed. T* coatings are well known for their abilities in this regard but I give some of the credit to the weird and wonderful lens shade (shade rather than hood, because it fits more or less flush with the front of the lens) which is effectively a rectangular porthole through which the lens peers from a deeply recessed cavity. It is highly effective at protecting the front element of the lens, too. Added 9th Dec 2103: I was shooting casually at a Christmas Fair this weekend and found the below effect, which is extremely unattractive: it is very reminiscent of the purple ghosting found when shooting the Panasonic MFT 7-14 F4 lens on an Olympus E-M1, which I am told is because of a difference in optical filtration approaches between the manufacturers, with Olympus filtering certain wavelengths in the lens and Panasonic choosing to do so on the filter pack. Whatever the explanation, I will be looking out for this in future with the 35mm F2.8 because not only is it irreparable in the RAW file, but in the Panny/E-M1 case it can show up in much less extreme circumstances (such as a church interior where purple ghosts of windows appear on walls some distance away) and can make the lens unusable in certain circumstances.
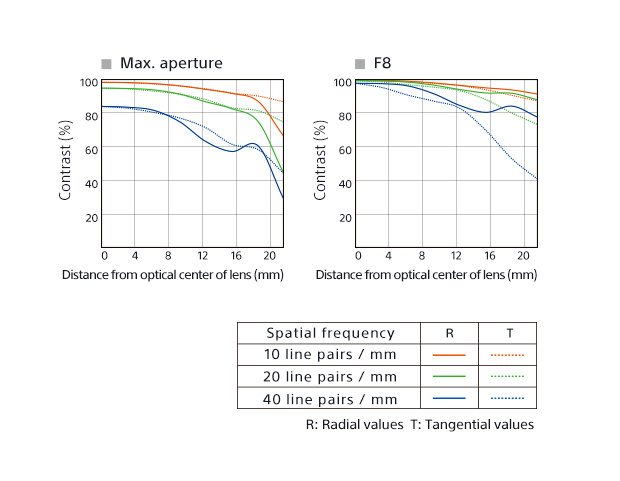
Resolution I save this most important aspect of performance almost to last because it is a thorny and complex question and I am not certain I yet have the answer. This is due to some inconsistent results in my field testing. But I do have some preliminary thoughts and suggestions. First, let's look at the MTF:
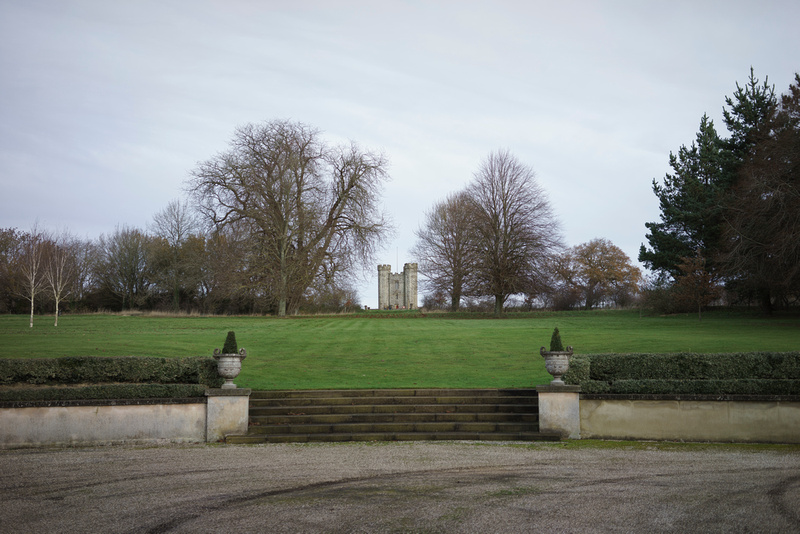
These factors are symptomatic of a complex set of design objectives and compromises and indicative of a hard lens to understand and, potentially, to work with - probably with compromised edges and corners and quite possibly with a wave-shaped field of focus. The good news is that most photographers, most of the time, will find the lens a joy to use: it is always sharp on centre, usually quite sharp at the edges and sometimes acceptably sharp in the corners. It has lovely colour and contrast, very nice micro-contrast (not quite up to classical Zeiss standards but pretty good). You can use it as a point and shoot and it will rarely let you down. The bad news is that getting to understand how best to sharpen the edges is a a frustrating exercise, and that in the process of learning, you will encounter slippery behaviours that seem to come and go at different apertures and subject distances. For example, the effects of the curved and possibly wave-shaped field of focus seem more pronounced at distance than at close range. My copy seems to have a mild de-centering, within my tolerance (though I might eventually get it looked at) and most often not noticeable at all, so please take that into account when you look at the examples. First, a close-range series: the scene looks like this, and clicking on the image will lead to frames shot at all significant apertures, with no distortion correction. For reference I post immediately afterwards an out of camera JPEG of the same frame to show you what distortion correction looks like for the lens. In the gallery, every shot is followed by an in-camera JPEG version of exactly the same frame.
My takeaways from this series: F2.8 is a reasonable if not stellar compromise across the frame. Centre sharpness is good, edges better than I expected from the MTF and corners not at all bad other than the effect of my possible de-centering (note: de-centering sometimes makes one side look better than it otherwise would, at the expense of the other, and that might be happening here) For the F4 frame, I re-focussed so as to be utterly sure that any residual focus shift was accounted for, and the centre is shaper but the edges are a touch worse. You might argue that this is due to the re-focussing but I don't think so: I think it is because the lens starts to exhibit field curvature as you stop down. Other series I have shot seem to bear this out. F5.6 is great on centre and good or better elsewhere: the effect of extra DOF seems to fight the curvature, and win. F8 is starting to show tiny, tiny diffraction effects over the frame but is still excellent - and my soft lower right corner is tightening up nicely with DOF From F11 onwards diffraction takes more of a toll but F11 is still very useable if you need the DOF.
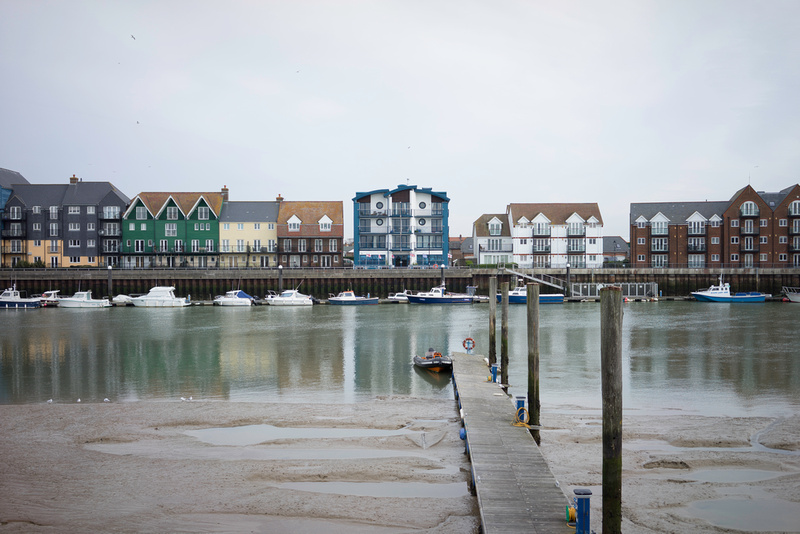
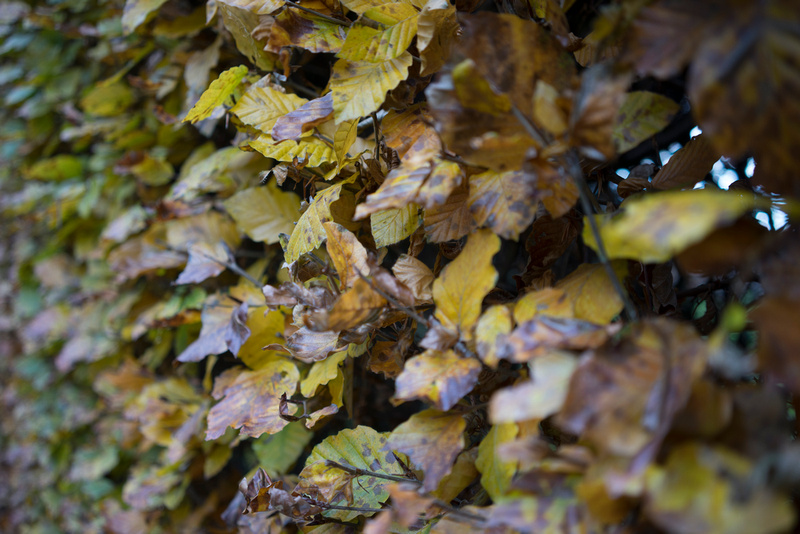
Now a more distant series (again, click for the full series, all downloadable at full size) At F2.8 the edges are a little soft but when viewed at 50% on a 100DPI screen or printed at 200DPI, they might just pass. At F4 things have tightened up a touch across the frame and resolution on centre is excellent whereas at the edges it is merely good. This seems the best aperture for a larger print At f5.6 the centre shows tiny, tiny loss of resolution from diffraction whereas the edges grow more noticeably softer. At F8 the central diffraction is more notable but detail levels are still pretty good. The edges remain a little soft. F11 and 16 are progressively more of the same, however F11 gets a good balance between DOF helping the edges (remember, we suspect field curvature) and keeping good levels of centre sharpness. F11 has, if anything, slightly better edges than F4 and depending on your intentions, might even make a better print than F4, even with the slightly lower centre sharpness. As we can see from the above, the prognosis at distance seems slightly different from that at close range. I will throw in here a series as above shot at a diagonal angle (click to visit the series) so you can make your own judgements about corner performance at distance: For my money, F8 is the best compromise here but F11 follows closely. Taken overall therefore, my surprising conclusion from all of the above is that F11, despite the diffraction, is the best overall aperture for those wanting to make print that are sharp to the edges and corners at larger sizes. A touch of Clarity will tighten things up a little and there is the added benefit of there being less of an issue with colour shading at this aperture. My only caveat is that I have yet to determine to what extent the camera's 'diffraction reduction' technology is applied to RAW files. I doubt that it is, but I will investigate this in more detail in my upcoming review of the camera itself. In the meantime be aware of the possibility that the relatively good performance at smaller apertures might be getting a touch of Bisto. BUT. But but but. That recommendation is for frames shot with focus carefully made on centre and this means that the field curvature that develops at F4 and F5.6, where centre resolution is best, will as above affect the edges. I have found that focussing a little further into the frame on centre will often let you have 'the best of both worlds'. Here is an example. These two frames were shot at F5.6 with focus in different places: clicking on each will load a full-sized version in your browser and you can drop in into LR or Photoshop for comparison. Focus in the first is on the facade of the red brick building centre, and in the second is on the rectangular mesh rooftop structure far behind and slightly to the right. It shows some moiré on the mesh. Overall, therefore, the lesson is 'know your lens' (or bracket focus!) if you want the best results. If you are mildly unfussy, any frame at F5.6 or F8 will likely give you great results. If you are very particular about your edges and especially your corners this might not be the perfect lens for you but with a bit of thought and effort, it could be. I want to add here thoughts about two similar lenses. Firstly, the 35mm Zeiss F2 on the Sony RX1. This is an absolutely lovely lens, famous for amazingly sharp edges even wide open. I love it. But I would prefer to use the FE 35mm F2.8 for serious work because with effort I can get good edges and corners and do so without the midfield weakness that often afflicts the F2 lens. Not everyone will agree but for me, the FE is overall the more useful lens. Next, the Sigma F1.4 35mm Art lens that I use on my Nikon D800. This is a lens that has gorgeous rendering wide open, but can be a pig to extract sharp edges from. Again, unless I were going specifically for the 'look' characteristic of the Sigma, I would find the FE lens easier to get sharp edges from. Your copies might vary! Bokeh An F2.8 lens is never going to be outstanding in this respect but I think the FE 35mm F2.8 does very nicely. Here are some examples:
Field of View The lens is billed as a 35mm but I have my doubts. It certainly has a narrower field of view than my Leica 35 Lux or Sigma 35mm Art lens, I would guess possibly about equal to a 37mm lens but I have no accurate way of measuring this absolutely rather than relatively. JPEG distortion corrections knock a little more off this, as will RAW processor distortion corrections, pushing it further towards 40mm. No biggie, but for those for whom 35mm is not quite wide enough, this could tip the balance. Form Factor Small, almost tiny, and very light, this lens is well-made and has a funky and effective shade. I can't imagine it being improved on in any of these respects. Conclusion This is a cracking little lens. A lot is asked of it: it has to deal with the highest resolution sensor in the 35mm world, and do so with good performance across a wide range of parameters. It has to be sharp, contrasty, have good colour and micro-contrast, nice bokeh, have low aberrations and high flare resitance and yet be small and light and not too expensive. That's a lot to ask. Sony and Zeiss between them have done a really nice job and I enjoy the way the lens handles and the images it produces. My reservations are minor and are to do with the complexity of thought and practice needed to get the very best results from the it. This is not, however, unusual at this price point and so I consider the lens to be not only good, but also good value. My fear is that many users might be initially put off by the tangible weaknesses of corners and edges at some apertures, preventing them from realising the more subtle and balanced range of abilities the lens posesses. My one wish is that Sony had decided to make a more expensive, more ambitious, albeit possibly slightly larger and heavier lens; one that was sharp from the edges wide open and to the corners by f5.6 and maybe had an F2 aperture. But that's just me: the truth is, Sony have pitched the system a fair bit lower in price than the D800E and made a choice of lens design to match. What is very good news is that this lens on this camera produces results that stand shoulder to shoulder with the similar focal length options I have tried on the Nikon but for less money and at a far lower excess baggage charge. Some of this is achieved by diluting the purity of the lens design proposition in favour of sharing the load with a certain amount of help from in-camera processing. I don't care, the results are good. Aaah… Bisto! My dirty secret. These days, I use it too...
This site is not for profit but I do support the charity Photovoice. I wrote about it in depth a while back and that article is here. If you have found this article useful and are feeling generous, I would hugely appreciate a donation to the charity, even just a pound or a dollar: every little helps. You can donate here and the Virgin Giving site is secure and takes cards and PayPal. The Gods of Great Photography will smile on you if you donate. I promise. please note: this review refers only to the use of the lens on an a7R. The A7, which I have not tried, has a different sensor with different 'toppings' and the in-camera corrections will be different as a result, as will the results of shooting tests. My guess, for what it is worth, is that the lens will be even better on the A7. Comments
Thanks for the kind comments - I have looked at permissions on those files and I have also tried looking at the article on a third party computer which has never been logged in to my Zenfolio account and as far as I can see, there is nothing wrong. Try again, with a shift-reload and if you can try on another machine. Otherwise it might be some mad ISP thing that I can't help with, I am sorry to say :-(
photographer 1234567890(non-registered)
Interesting review, you obviously put a lot of time into it; thank you!
However, NONE of the images are visible, all I see is a bunch of blank white! I'd love to see your samples, can you fix this? Thanks.
Yim(non-registered)
Nice article. I was also hoping for f2 or maybe RX1 with the EVF.
what's your opinion on FE55?
EM,
I haven't tried it but the Samyang/Rokinon 24mm gets quite a good rap. Otherwise the Nikon 28mm F1.8G is good. Most of the lenses I have tried are Leica M (nothing under 35mm that I have tried has pleased me) and various Nikon fit lenses, most of which are pretty good. The Zeiss 21mm F2.8 for example works nicely.
EM(non-registered)
Tim,
Thanks for the great review. I have been trying the Zeiss 35mm f2.8 and the 24 mm f1.8 (crop sensor) on my Sony Alpha7. I was shooting night sky at f2.8-3.2 and was quite disappointed with the bullseye green and purple color aberration which I found almost impossible to get rid of in LR5. Right now it looks to me like the 24mm is better for me but I really wanted a full frame lens. Are you aware of other similar lenses that I can use with my A7?
No comments posted.
Loading...
|